SoftBank Shares Slide After Arm Earnings Miss Fuels Tech Stock Sell-Off
  Nvidia CEO Jensen Huang Says AI Investment Boom Is Just Beginning as NVDA Shares Surge
  SpaceX Prioritizes Moon Mission Before Mars as Starship Development Accelerates
  American Airlines CEO to Meet Pilots Union Amid Storm Response and Financial Concerns
  Baidu Approves $5 Billion Share Buyback and Plans First-Ever Dividend in 2026
  CK Hutchison Launches Arbitration After Panama Court Revokes Canal Port Licences
  Once Upon a Farm Raises Nearly $198 Million in IPO, Valued at Over $724 Million
  Amazon Stock Rebounds After Earnings as $200B Capex Plan Sparks AI Spending Debate
  OpenAI Expands Enterprise AI Strategy With Major Hiring Push Ahead of New Business Offering
  Prudential Financial Reports Higher Q4 Profit on Strong Underwriting and Investment Gains
  Instagram Outage Disrupts Thousands of U.S. Users
  Uber Ordered to Pay $8.5 Million in Bellwether Sexual Assault Lawsuit
  Missouri Judge Dismisses Lawsuit Challenging Starbucks’ Diversity and Inclusion Policies
  Toyota’s Surprise CEO Change Signals Strategic Shift Amid Global Auto Turmoil
  FDA Targets Hims & Hers Over $49 Weight-Loss Pill, Raising Legal and Safety Concerns
  Sony Q3 Profit Jumps on Gaming and Image Sensors, Full-Year Outlook Raised
  Trump Backs Nexstar–Tegna Merger Amid Shifting U.S. Media Landscape


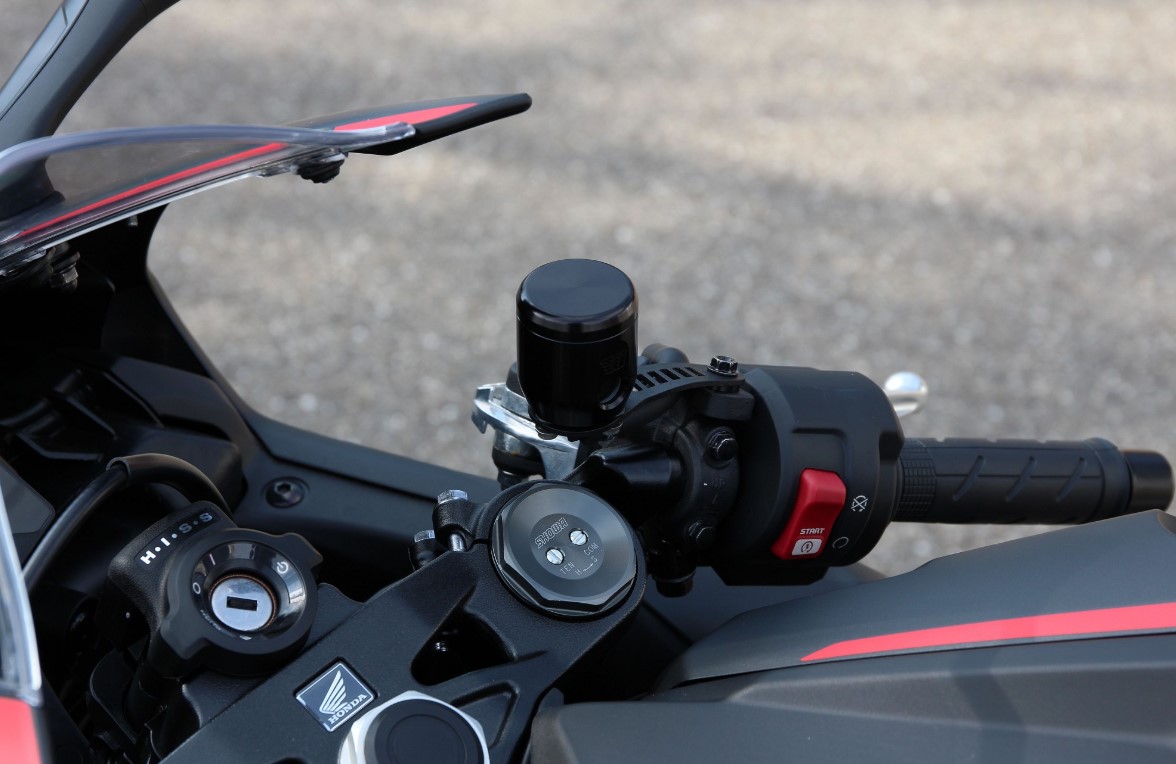
Bad breaks are bad news. Your motorcycle safety depends largely on having responsive brakes. If your brakes are going out or less effective than you’d like, it’s time to check out your brake fluid. Here’s a basic guide to signs you need to change your brake fluid, how to change it and where to find the best motorcycle brake fluid.
When to Replace Your Brake Fluid
When was the last time your replaced your brake fluid? If you want to avoid sudden brake failure, most manufacturers recommend replacing your brake fluid every two years. Unfortunately, few riders actually follow this recommendation.
The danger in using old brake fluid is that you may not receive enough warning that it’s time to replace it. Because your brake fluid is glycol based and hygroscopic, any moisture can cause it to have a lower boiling point and reduce efficiency in warm temperatures. Too much moisture and your brakes will start to feel squishy and dramatically increase your stopping time. That’s bad news for riders everywhere. Follow these steps and schedule a brake fluid change every two years.
Collect Your Tools
If you’re used to installing aftermarket and OEM motorcycle parts, you probably already have all the tools you need. Grab a few clean rags, screwdriver, wrench, bleeder hose and a container. Consult your owner’s manual for the best brake fluid for your bike and get ready to get started.
Bleed Your Brakes
First, cover up your bike with a few rags. While the hose and bucket are designed to catch most of the brake fluid, be prepared for a little mess. This corrosive liquid doesn’t treat your bike’s paint very nicely, so keep it protected. Here are the steps to removing your old brake fluid:
Remove the master cylinder reservoir cap.
Remove the diaphragm and backing plate.
Attach the hose to the bleeder bolt and slowly loosen it.
Pump your brakes to force your brake fluid out through the hose.
Repeat until all the fluid is out.
Fill the Reservoir
Once your old fluid is out, it’s time to tighten the bleeder bolt and add all your new fluid. Fill up the reservoir completely with your new fluid. Before you fire up your bike, you’ll need to ensure your brakes are pressurized and there’s no air in the system.
Do this by slightly opening the bleeder bolt and pumping your brakes. Initially, you should only be forcing air out. Soon you’ll start to see some of your new brake fluid being discharged. Keep pumping until all the air bubbles are out. Tighten your bleeder bolt, top off your reservoir and get ready to ride.
Clean Up
Be cautious as you first start up your bike. Take it slow around your driveway as you test out your new brakes. Improper pressurization could leave you without brakes, so don’t go flying out of the driveway on your first ride with your new brake fluid.
Shop online for all your premium brake fluid, OEM motorcycle fairings and any other OEM or aftermarket maintenance needs. Whether you’re just looking to keep your bike safe or shopping for premium ways to personalize your ride, enjoy a wide range of brands and affordable prices online.
This article does not necessarily reflect the opinions of the editors or management of EconoTimes.