FxWirePro- Major Crypto levels and bias summary
  EUR/JPY Bullish Above 185: Triple EMA Shield Targets 187.25–188 Breakout
  Ether Breaks Below $2,100: Triple EMA “Sell-the-Rally” Setup Targets $1,900
  FxWirePro: GBP/AUD gains slightly as U.S.-Iran deal hopes boost risk sentiment
  FxWirePro: USD/JPY eases slightly but trend is still bullish
  FxWirePro: GBP/USD rises as hopes for U.S.-Iran deal boost risk appetite
  FxWirePro: EUR/AUD neutral in the near-term, scope for downward resumption
  FxWirePro: GBP/NZD advances as kiwi weakens ahead of RBNZ decision
  FxWirePro: AUD/USD eases as US-Iran questions mount
  FxWirePro: USD/CNY edges higher as market sentiment turns cautious
  FxWirePro: AUD/USD eases on cooler than anticipated CPI
  FxWirePro: USD/ZAR downside pressure builds, key support level in focus
  AUD/JPY: Triple EMA “Buy-the-Dip” Setup Targets 115 With Layered Support Intact
  FxWirePro: USD/JPY edges higher as traders monitor Middle East developments
  FxWirePro: NZD/USD slips ahead of RBNZ policy decision
  FxWirePro: USD/ZAR gains some ground but outlook is bearish


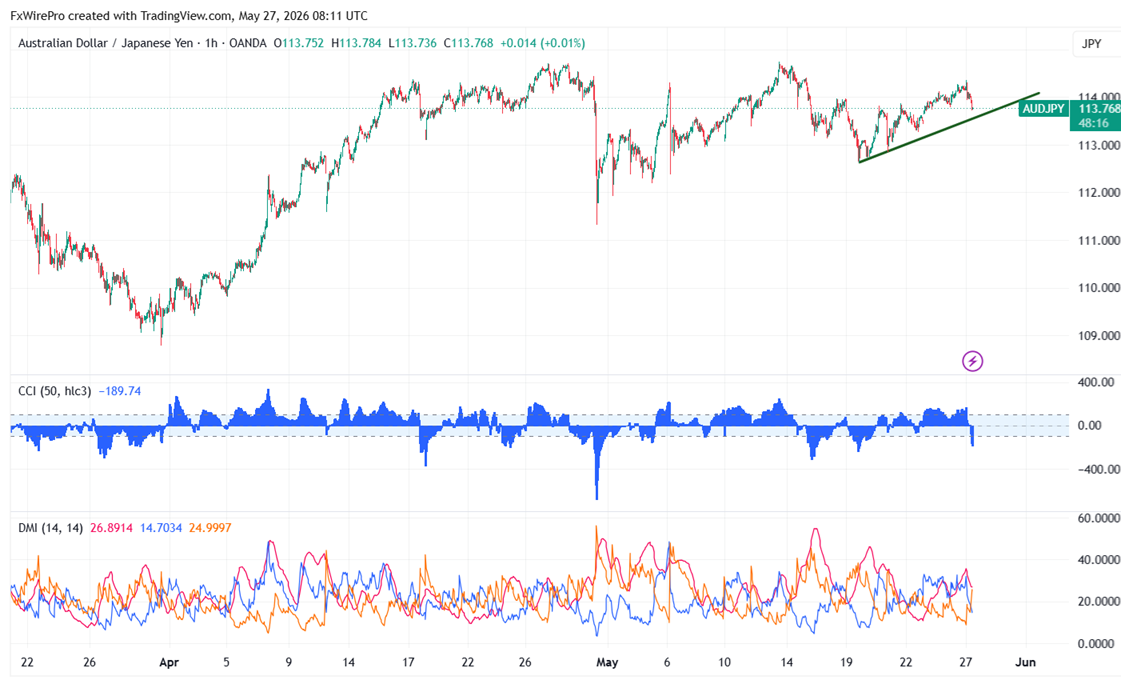
Following weak Australian CPI figures, AUDJPY gave back some of its recent rise. It dropped during the day to 113.72 and is now trading close to 113.77.
|
Technicals |
CMP -113.77 |
Trend |
|
|
1- Hour chart |
Value |
|
|
|
55 EMA |
113.96 |
CMP<value |
Bearish |
|
200- EMA |
113.75 |
CMP >value |
Bullish |
|
365- EMA |
113.66 |
CMP>value |
Bullish |
Major support- 113/112/111.80/110.
Major resistance- 114/114.40/115/116.25
|
Momentum indicator |
Inference |
Value |
|
CCI(50) |
Bullish |
-164.14 |
|
ADX |
Neutral |
|
It is good to good to buy on dips around 113.38-40 with SL around 112.60 for a TP of 115.